The SD (Secure Digital) card is a widely used removable storage device in embedded systems. It is compact, high-capacity, fast in read/write speed, and easy to carry—making it a key tool for data storage and transmission.
Introduction #
This lab introduces how to use the Xilinx ZYNQ chip to read from and write to an SD card.
The Zynq chip features an SD card interface, which enables file read/write operations on SD cards. This interface typically operates over either the SPI (Serial Peripheral Interface) or SDIO (Secure Digital Input Output) protocol. SPI is suitable for low-speed operations, while SDIO supports high-speed data transfers.
FatFs Library #
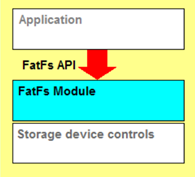
In this lab, we use the FatFs library to handle file operations on the SD card.
FatFs is an open-source file system module that provides a lightweight and flexible API to read, write, and manage files on FAT-based file systems.
It supports FAT12, FAT16, and FAT32—commonly used on storage devices such as disks, SD cards, and USB flash drives—and is widely adopted in embedded applications.
FatFs features include:
- Lightweight and portable — its compact core can be customized for system needs and is independent of the underlying OS or hardware.
- Multiple API functions — for file open/close, read/write, and directory management.
- Support for long file names
- Optional caching — to speed up storage access
- Reliability and error handling
Vivado Project Setup #
We are using the ZedBoard development board.
-
The Vivado project used here is based on the one from “ZYNQ UART Print Output — Vitis FPGA Edition.” Refer to that article for details on building the Vivado project.
-
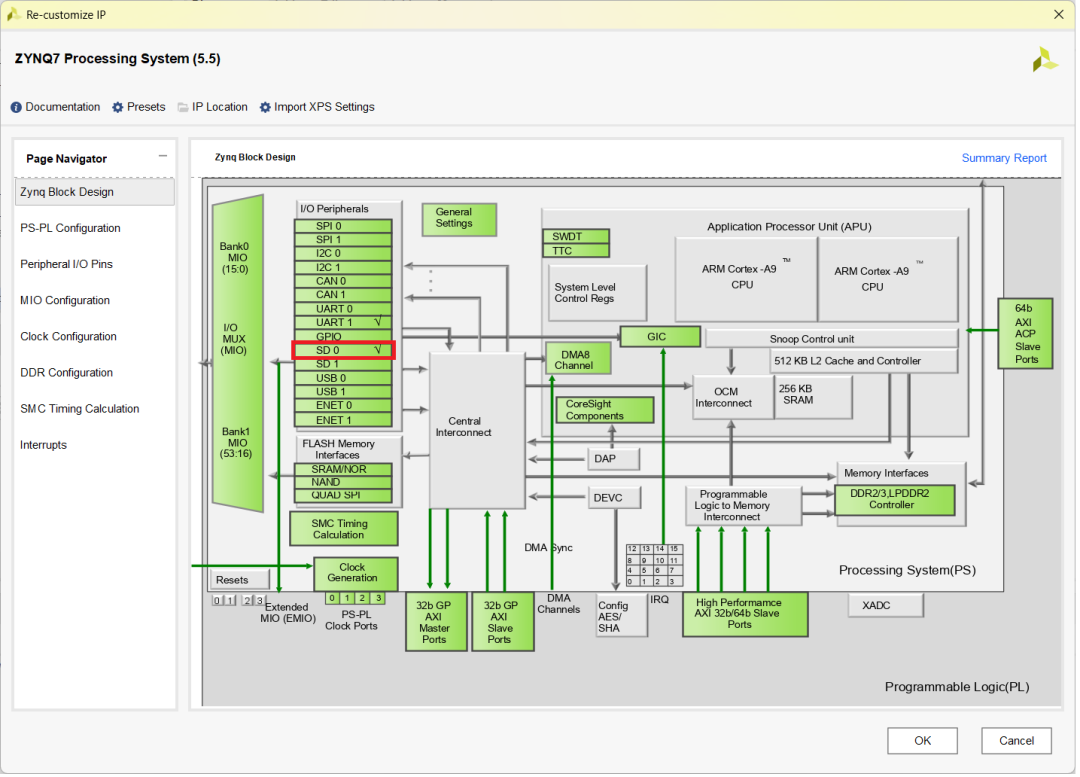
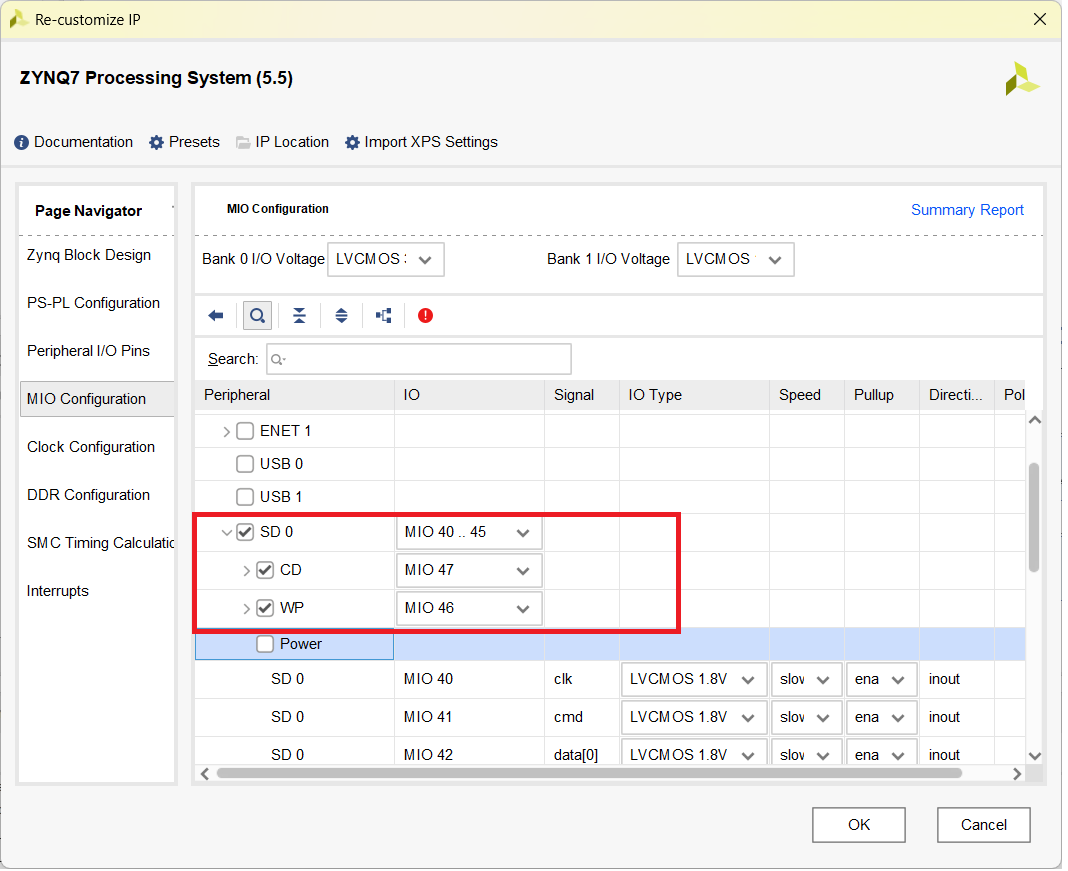
Modify the Vivado project to enable the SD 0 peripheral.
- The ZedBoard schematic for the SD card interface is shown below.
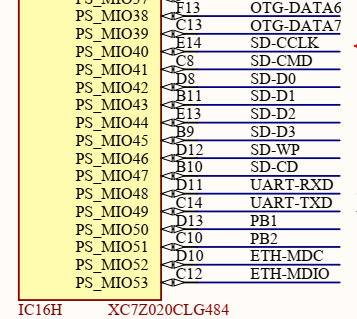
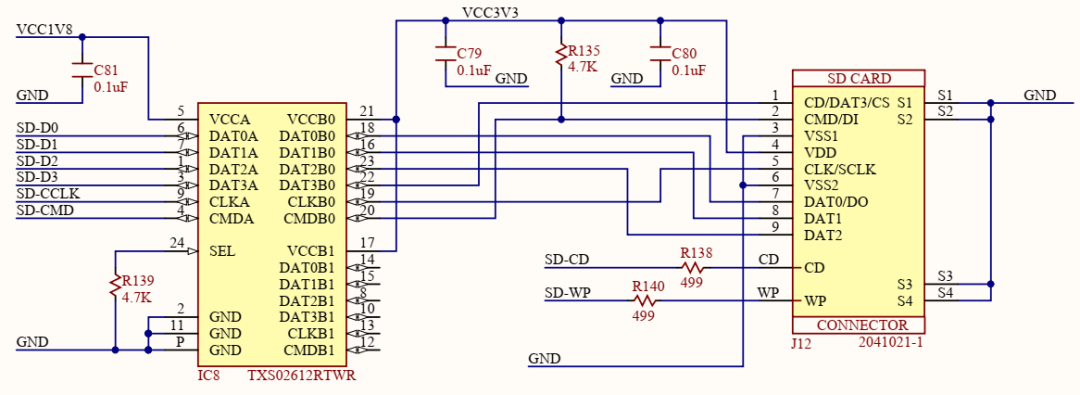
Use this schematic to configure the MIO pins properly.
-
Save the design. Right-click the
.bdfile and select “Generate Output Products…”. -
Right-click the
.bdfile again and choose “Create HDL Wrapper…”. In the popup, choose “Let Vivado manage wrapper and auto-update”, then click OK. -
From the Flow Navigator, click “Generate Bitstream”. Once done, go to File > Export > Export Hardware to export hardware info (
.xsa), which contains PS configuration. If unsure, refer to “ZYNQ UART Print Output — Vitis FPGA Edition.”
Vitis Project Setup #
-
In Vivado, go to Tools > Launch Vitis IDE to start Vitis.
-
Create a new Vitis platform project. Setup instructions can be found in “ZYNQ UART Print Output — Vitis FPGA Edition.”
-
Create a new Vitis application project named
SD_DEMO_SDK, using the Hello World template. -
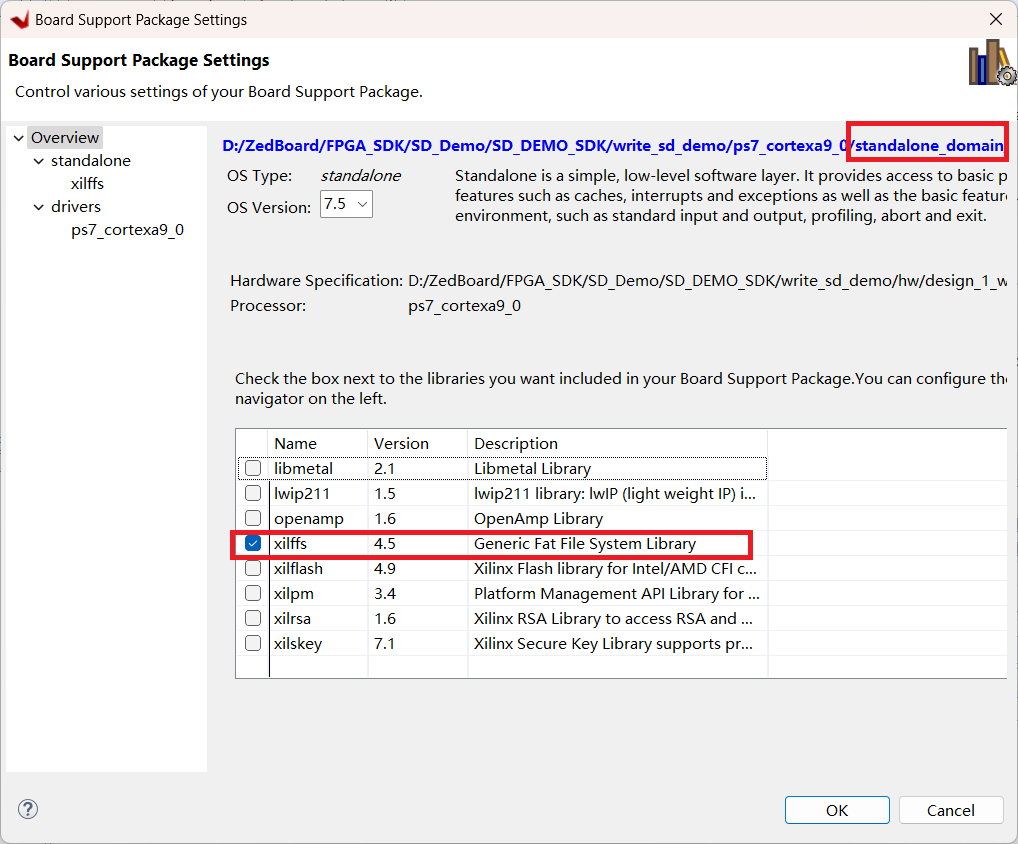
In Board Support Package Settings, enable the
xilffsfile system. Make sure you’re using the Standalone OS mode.
- The project includes two key files:
main.candbmp.h.
bmp.hdefines headers for various bitmap images.main.cdefines 3 functions:
void genTestImage(u8 * imageSrc);
void bmp_write(char * name, char *head_buf, char *data_buf);
int main(void);
This example first uses genTestImage() to generate a 640×480 color bar image, then uses bmp_write() to write the image header and data to the SD card.
-
Build the project, download it to the board, and insert the target SD card.
-
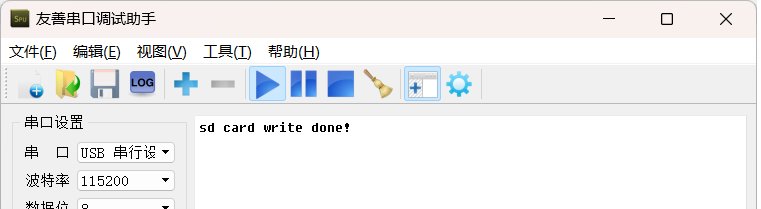
When the program finishes, the serial console prints:
sd card write done!
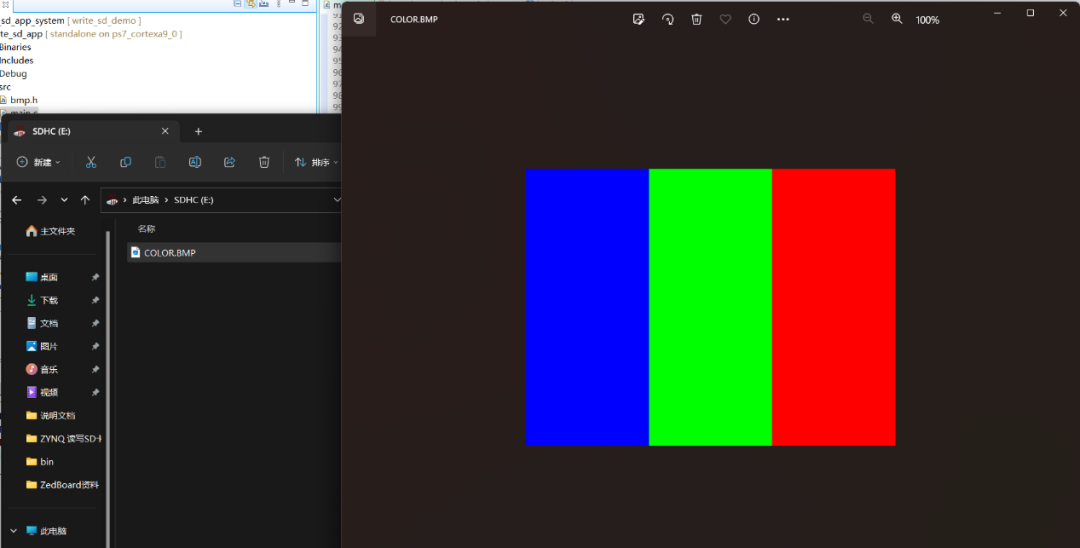
- Power off the board, remove the SD card, and insert it into a PC. You’ll see a file named COLOR.BMP. Open it to confirm it’s the 640×480 color bar image we created.
Summary #
This lab demonstrated how to use the FatFs library to mount an SD card, create and write files. To read files, simply use f_read() from FatFs. Some source code is included in Appendix A. Full source code can be downloaded by sending ZYNQ_SD to the official WeChat account. The project uses Vivado 2021.1.
Appendix A #
int main(void)
{

  FRESULT rc;
  genTestImage(gImage_640x480);

  rc = f_mount(&fatfs, "0:/", 0);
  if (rc != FR_OK)
  {
    return 0 ;
  }

  bmp_write("color.bmp", (char *)&BMODE_640x480, (char *)&gImage_640x480) ;
  xil_printf("sd card write done! \n\r");

  return 0;
}

void genTestImage(u8 * imageSrc)
{
  int total = 0;
    for (int idxRow = 0; idxRow < 480; idxRow++)
    {
        for (int idxCol = 0; idxCol < 640; idxCol++)
        {
            if ( idxCol >= 0 && idxCol < 213)
            {
                *(imageSrc + (640*idxRow + idxCol)*3) = 0xFF;
                *(imageSrc + (640*idxRow + idxCol)*3 + 1) = 0x00;
                *(imageSrc + (640*idxRow + idxCol)*3 + 2) = 0x00;
            }
            else if (  idxCol >= 213 && idxCol < 426)
            {
                *(imageSrc + (640*idxRow + idxCol)*3) = 0x00;
                *(imageSrc + (640*idxRow + idxCol)*3 + 1) = 0xFF;
                *(imageSrc + (640*idxRow + idxCol)*3 + 2) = 0x00;
            }
            else if ( idxCol >= 426 && idxCol < 640)
            {
                *(imageSrc + (640*idxRow + idxCol)*3) = 0x00;
                *(imageSrc + (640*idxRow + idxCol)*3 + 1) = 0x00;
                *(imageSrc + (640*idxRow + idxCol)*3 + 2) = 0xFF;
            }
            total++;
        }
    }
}


void bmp_write(char * name, char *head_buf, char *data_buf)
{
  short y,x;
  short Ximage;
  short Yimage;
  u32 iPixelAddr = 0;
  FRESULT res;
  unsigned int br;         // File R/W count

  memset(&Write_line_buf, 0, 1920*3) ;

  res = f_open(&fil, name, FA_CREATE_ALWAYS | FA_WRITE);
  if(res != FR_OK)
  {
    return ;
  }
  res = f_write(&fil, head_buf, 54, &br) ;
  if(res != FR_OK)
  {
    return ;
  }
  Ximage=(unsigned short)head_buf[19]*256+head_buf[18];    // bm_width
  Yimage=(unsigned short)head_buf[23]*256+head_buf[22];    // bm_height
  iPixelAddr = (Yimage-1)*Ximage*3 ;
  for(y = 0; y < Yimage ; y++)
  {
    for(x = 0; x < Ximage; x++)
    {
      Write_line_buf[x*3 + 0] = data_buf[x*3 + iPixelAddr + 0] ;
      Write_line_buf[x*3 + 1] = data_buf[x*3 + iPixelAddr + 1] ;
      Write_line_buf[x*3 + 2] = data_buf[x*3 + iPixelAddr + 2] ;
    }
    res = f_write(&fil, Write_line_buf, Ximage*3, &br) ;
    if(res != FR_OK)
    {
      return ;
    }
    iPixelAddr -= Ximage*3;
  }

  f_close(&fil);
}